Git has become one of the most popular source control systems. Thousands of enterprises are using Git for source control management. There are several reasons why Git is a compelling tool to consider for source control. Git being a distributed version control system, the central copy of the code is replicated as a local repository in the work space of the local machine. This facilitates working in offline mode with faster branching, history etc. which are otherwise expensive operations in Centralized repository systems like TFVC or Subversion. It has extensive integration with many tools like Project Management tools, Build Automation tools and other surrounding tools for ALM and DevOps. Microsoft offers Git as a source control option along with TFVC as part of VSTS and TFS.
Knowledge of Git helps even if that’s not the version control being used for one’s work projects. One can go create public repositories for Open source work, or download / fork other public repositories and contribute to them. Git and GitHub are a great option to source control personal projects.
Many times, it may become a bit of a challenging transition to use Git if one is used to TFVC as a source control on WIndows. TFVC is so much a GUI based tool where Git is best used via command line. Git’s origins are in Linux based systems, and it’s client interfaces were designed to be used in Linux systems. Hence for Windows based development, to use Git as a Source control system, the setup is not as straightforward to understand. While there are many websites which go through setting up Git from scratch on Windows, this is an attempt to explain the steps in more detail so setting up Git for command line use is better understood and it’s easier to cross that initial hump.
Also, Git is best used with command line, since it has been designed that way. For Windows, use Posh-Git which provides an excellent command line interface. Here are the detailed steps for setting up Git and Posh-Git so Git can be used with command line.
1.Install Git for Windows from the website:
Choose the below option from the Wizard. This will allow you to install Git Bash and Posh-Git.

Git Bash is an application for Microsoft Windows environments which provides an emulation layer for a Git command line experience. Bash is an acronym for Bourne Again Shell. Bash is a popular default shell on Linux and macOS. Git Bash is a package that installs Bash, some common bash utilities, and Git on a Windows operating system.
However, it is recommended to use Git with Posh-Git. It’s a PowerShell environment for Git. It’s an open source project hosted on GitHub. Here is the Post-Git GitHub link.
Excerpt from the Post-Git Github site about what Posh-Git offers for Git:
“posh-git is a PowerShell module that integrates Git and PowerShell by providing Git status summary information that can be displayed in the PowerShell prompt, e.g.:
![C:\Users\Keith\GitHub\posh-git [master ≡ +0 ~1 -0 | +0 ~1 -0 !]>](https://github.com/dahlbyk/posh-git/wiki/images/PromptDefaultLong.png)
posh-git also provides tab completion support for common git commands, branch names, paths and more. For example, with posh-git, PowerShell can tab complete git commands like checkout by typing git ch and pressing the tab key. That will tab complete to git checkout and if you keep pressing tab, it will cycle through other command matches such as cherry and cherry-pick. You can also tab complete remote names and branch names e.g.: git pull or<tab> ma<tab> tab completes to git pull origin master.“
Just to clarify, Git will work both through Git Bash and Posh-Git. However Posh-Git has a better interface which we will show later towards the end of the article.
After Git for Windows installation is completed,
2. Now you need to install Post-Git to be able to use Git from PowerShell.
While all instructions are there on the posh-git GitHub website, below are detailed step by step instructions for easier navigation through all the steps:
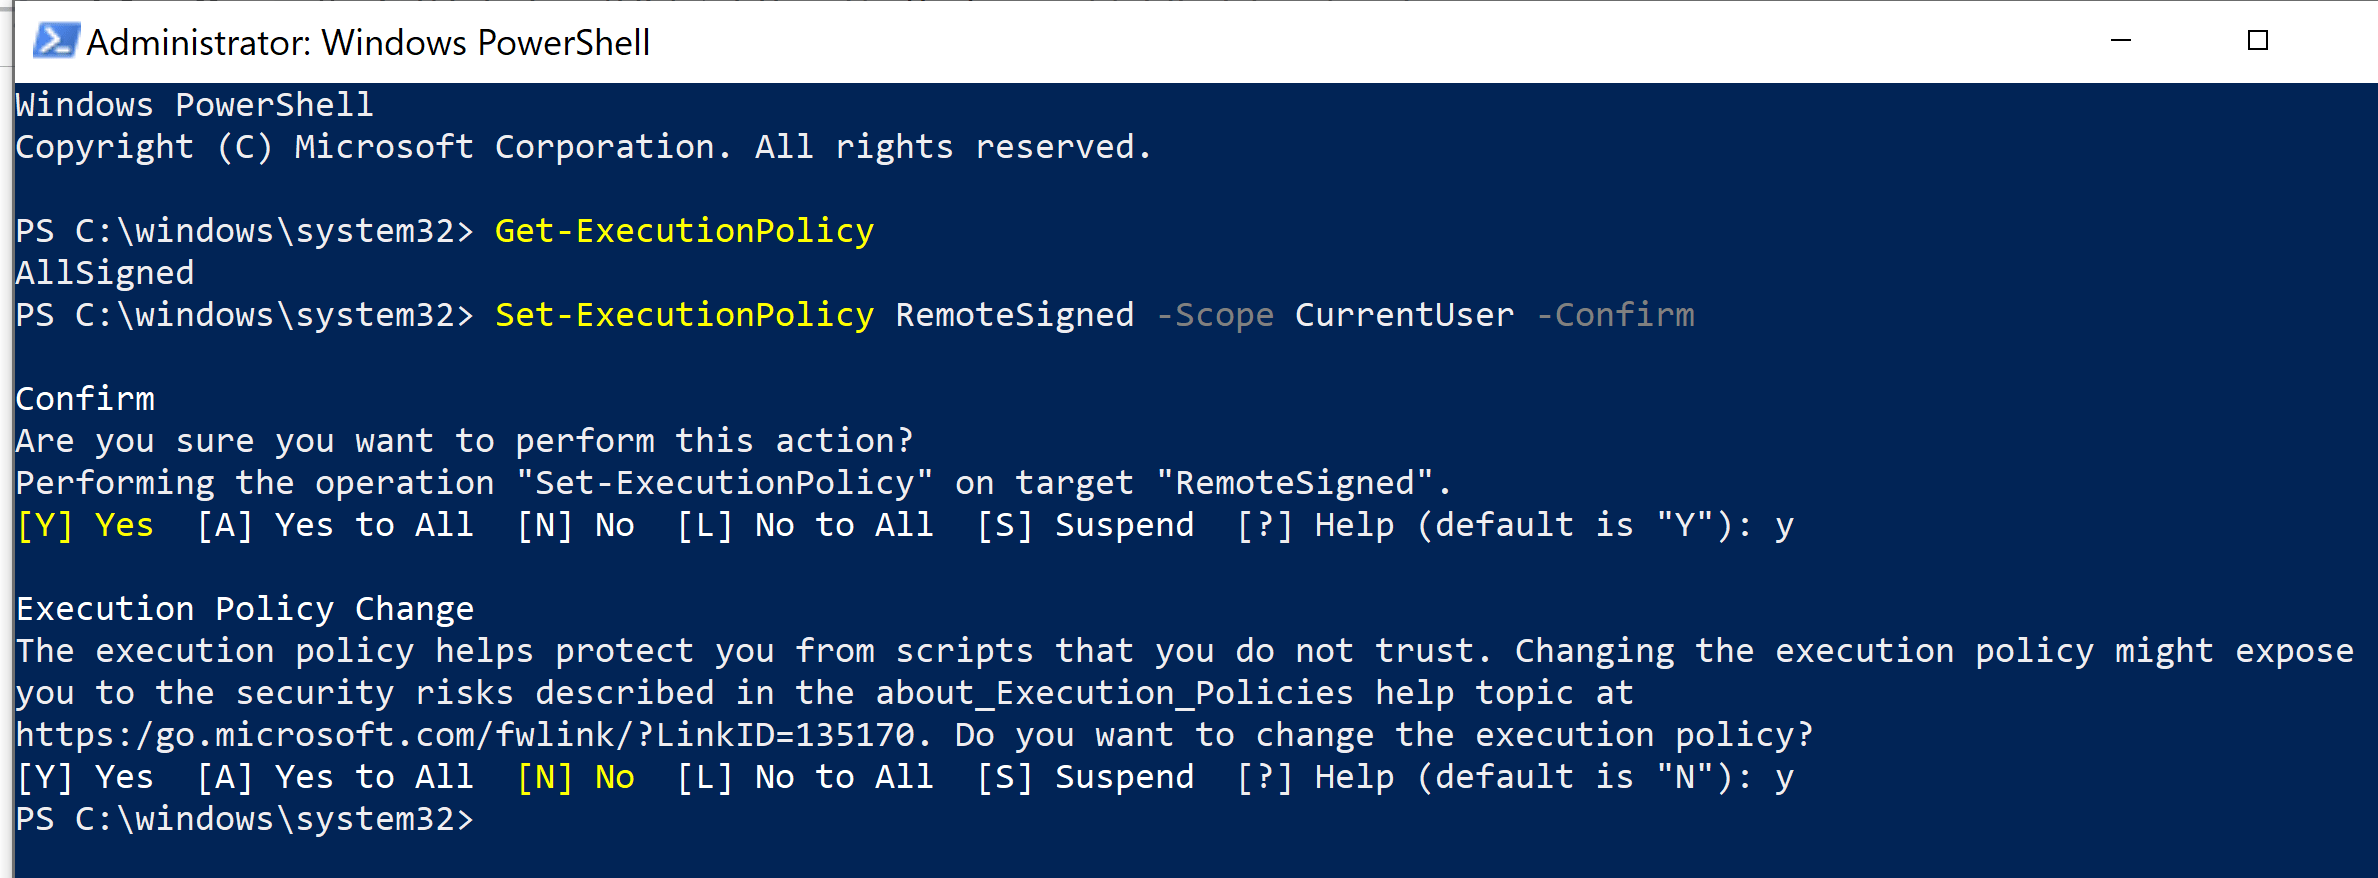
Open PowerShell as administrator.
Set Execution Policy to RemoteSigned so Posh-Git can be safely downloaded. Basically RemoteSigned execution policy protects from running unsigned PowerShell scripts downloaded from the internet.
Now download and install posh-git. Run the below command.
PowerShellGet\Install-Module posh-git -Scope CurrentUser -AllowPrerelease -Force
This may give a AllowPrerelease parameter is not recognized error as below:
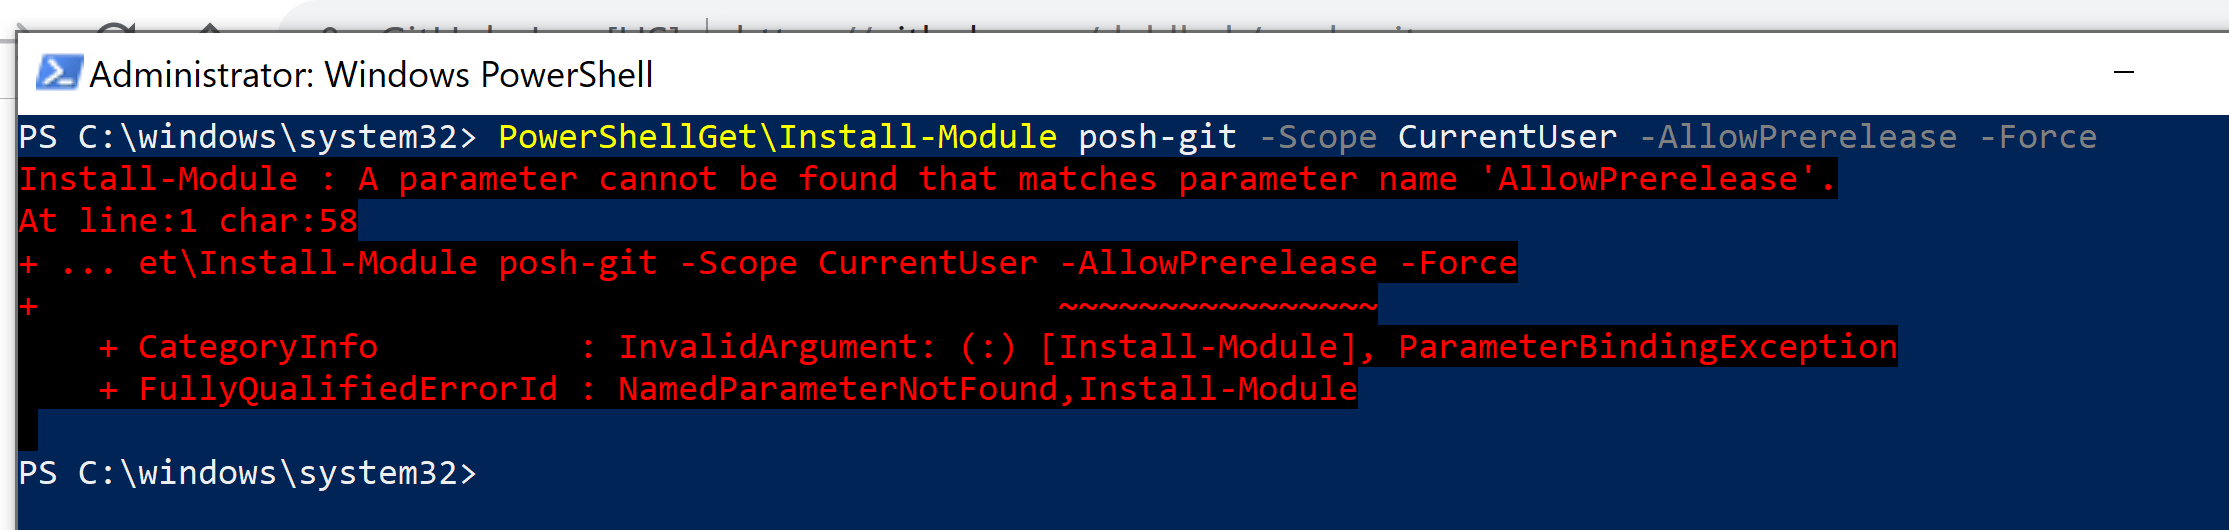
If the AllowPrerelease parameter is not recognized, update your version of PowerShellGet to >= 1.6 e.g. #
Install-Module PowerShellGet -Scope CurrentUser -Force -AllowClobber
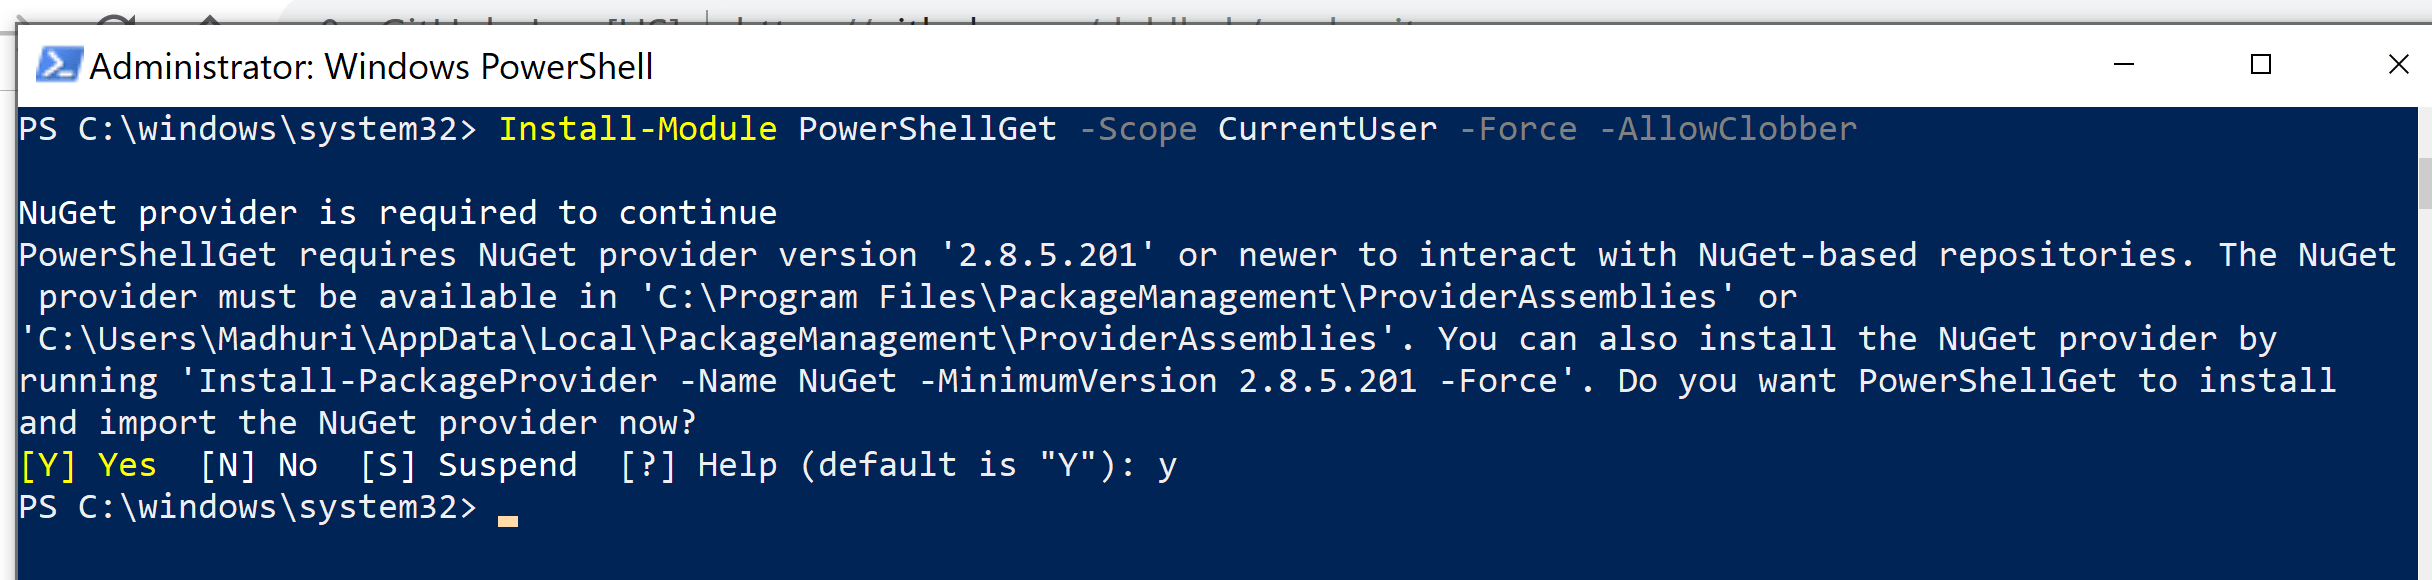
Once again run the command to get Posh-Git as below.

3. After you have installed posh-git, you need to configure your PowerShell session to use the posh-git module.
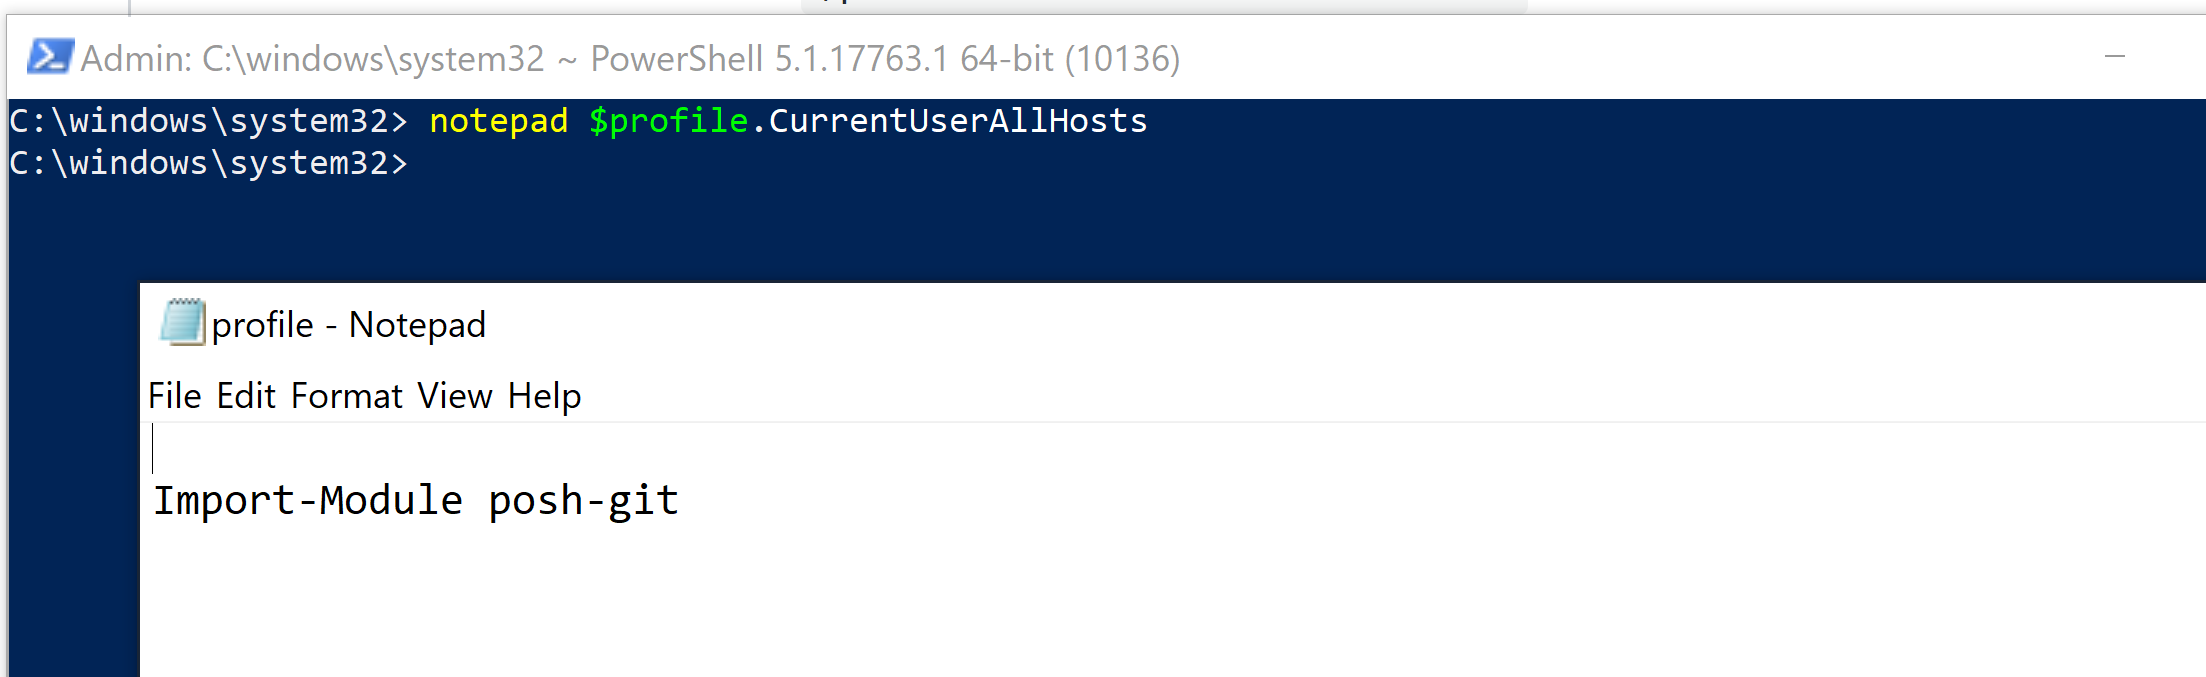
The first step is to import the module into your PowerShell session which will enable git tab completion. You can do this with the command:
Import-Module posh-git
This will manually execute the Import-Module command every time you open a new PowerShell prompt. It’s better if posh-git to be available in all PowerShell hosts (console, ISE, etc).
For that purpose, execute
Add-PoshGitToProfile -AllHosts.
This will add a line containing Import-Module posh-git to the file $profile.CurrentUserAllHosts.

Check the entry to import module exists powershell profile script by executing the below command in power shell:
4. Check Git Version in Power Shell :

Now , Git can be used with Power Shell and Posh-Git. A project can be created and GitHub can be used as a remote repository. It can be used with Git Bash as well, however it is recommended to keep the Posh-Git as primary CLI and Git-Bash can be the secondary CLI.
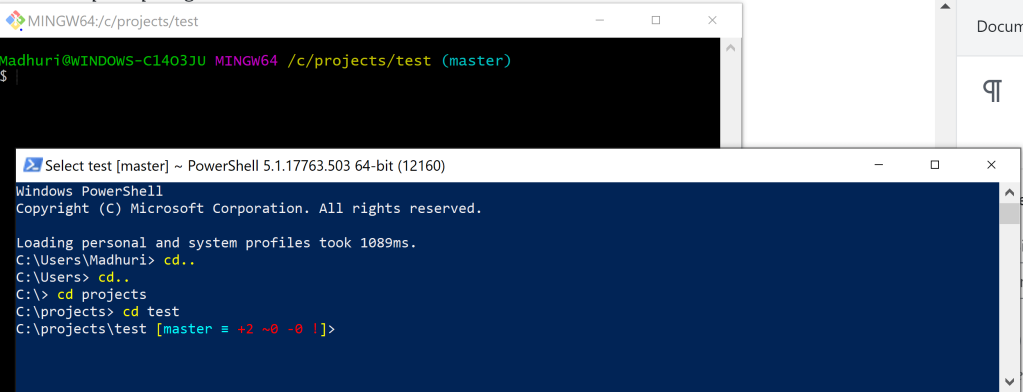
To illustrate one example how Posh-Git and Git Bash command line interfaces compare, and why Posh-Git is considered better- see below diagram where for a ‘test’ Git project how the ‘master’ branch shows up where two files have been added to the branch. Posh-Git clearly displays the 2 files added.
The Git websites cover many of the Git commands to set up initial projects very well. Learning the Git commands at the Git website and using other online tools will help in becoming further very comfortable with Git.
